Saturday 9 April 2011

3D adventure game: Part 3

You can get the .blend file and reference images used in this tutorial from: http://www.blendertutorialsfornoobs.co.cc/downloads.html

In the last tutorial we added legs and a head to our character. In this tutorial we will add hands and feet/shoes to the character, apply the mirror modifier and join the mesh, and add an armature skeleton which will let you move the different parts of the character for animation.

Hands

To make the hands start in front view (Numpad 1) and extrude the wrist down using "S" key to size the loop to the background image. Stop just before you get to the fingers and switch to side view to line the hand up with the image.

Once you have done that you need to start defining the finger loops:


To do this just select two opposite vertices's that line up with the finger position and size then using "S" key. If you don't have enough vertices's you can select an edge and press "W > Subdivide"

Next you need to join the loops for each finger rather than have one big loop. To do this select the two vertices's that will be in between the fingers and press "F" key. A line should appear in between making a separate loop:


Once you have done that its just a case of extruding the fingers and size them to match the image. you should have something that looks like this: (the thumb is is the same process)


You can tweak individual vertices's to make a better looking hand if you want and the more time you spend the better the result will be.

Shoes

The final part to the character is the shoes or feet depending on your character. Shoes are easier to make since you don't have to detail each toe.

To start the shoes extrude the ankle loop straight down to the bottom where the heel would be.  in face select mode "CTRL + TAB + 3" select a few faces on the front of the shoe and press "delete > Faces"

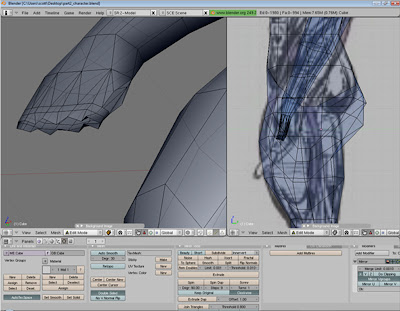
you should now be left with an open section where you can extrude the shoe from:


Now you can just extrude the rest of the shoe forward working from the side view to keep it to scale. Remember to outline features such as the heel and the base of the shoe. When you are done you should have something like this:


You can now apply the mirror modifier because its no longer needed and join the mesh together.


In the buttons panel under the "Modifier" tab click the apply button. (Make sure you are in object mode) When you return to edit mode you will notice that you can now edit both sides of the character. Select the two loops that meet at the centre of the character using "ALT + right click" to select a loop and "Shift + ALT + right click" to select multiple loops.


Press "F" key and select "Skin faces/edge-loops". This will fill in the gab between the character and prevent a seam from showing.

Skeleton

The next stage to making the character is to make a skeleton which will affect the mesh when its moved.

Enter object mode and in front view press "Space > Add > Armature". Position the armature in the upper chest area and press "TAB" to enter edit mode. Use the spheres at the ends of the armature to extrude from and start to make a basic skeleton.


In the buttons panel under the "Armature" tab you can toggle X-ray to let you see the bones through the mesh. Continue extruding the bones for the head, spine, arms and legs until you have something like this:


Don't forget to line the bones up in side view so they are mostly hidden in the mesh. Once you are finished press "TAB" to return to object mode.

now we need to make the character mesh follow the movements of the skeleton. To do this select the mesh and then select the skeleton. It is important that you select the mesh first. Press "CTRL + P" keys and select "Armature". In the "Create vertex groups" window select "Create from bone heat".

Your mesh will now follow the skeleton.

To test this you can select the skeleton and on the toolbar choose "Pose mode" from the mode drop down box. You can now select any bone and press either "G" or "R" key to move the bone.

We will be using the pose mode to animate the character in a later tutorial.


In the next tutorial we will:
  • Detail the mesh to give the effect of clothes
  • Prepare the mesh for textures
  • Create a texture using a photo editing program such as Photoshop or GIMP (free)
  • Apply the texture and view the render result
Thanks for reading

More soon...

3D adventure game: Part 2

You can get the .blend file and reference images used in this tutorial from: http://www.blendertutorialsfornoobs.co.cc/downloads.html

In the last tutorial we created the torso and arms of our main character. In this tutorial we will add Legs and a head to the character.

Legs

The legs are quite simple to make if you have a good starting point.


Select the leg loop by pressing "ALT + right click" and in the front view (Numpad 1) extrude the loop down the leg by pressing "E" key and dragging. Line each loop up with the reference image and when you get to the feet leave the loop open. Once you have the front view sorted move to the side view and line up and size each loop.

You should have something like this:


Don't worry if its not perfect, you can always make small changes after.

Now that our character has legs, we need to give him a head:

Head

The head is one of the most difficult parts of a character to model because  it requires so much detail. To get the basic shape switch to front view (Numpad 1) and start extruding the neck upward using the "S" key to size each loop as necessary. when you get to the top of the head and need to close the loop, extrude upward once more by a small amount and then press "ALT + M". click "At centre" in the merge menu.

Switch to the side view and size the loops to match the image. When all the loops are matched you should have something that resembles a head.


Now that we have a head we need to start defining features such as the nose and mouth. This could be done in the sculpt mode but since our model is low poly the edges would'nt be sharp and we wouldn't get enough detail. The easies way is to add more vertices's by adding a loop cut "K" or subdivide "W", you can then move individual edges to define the features.

It might be easier to work in perspective view for this part so you can see the result better.

You should have something like this:


Its nothing special yet but you can tell its a face now. You can add as much or as little detail as you want and you can smooth the mesh to get a better result. To do this go into object mode and in the buttons panel select "Set smooth". You can press "Set solid" to return.

This is the character so far:


In the next tutorial we will
  • Add hands
  • Add feet
  • Apply the mirror modifier and join the mesh
  • Add an armature skeleton
Thanks for reading

More soon...

Friday 8 April 2011

3D adventure game: Part 1

In this series of tutorials I will assume that you have basic 3D modeling skills. If not visit: http://www.blendertutorialsfornoobs.co.cc/ for more basic tutorials

You can get the .blend file and reference images used in this tutorial from: http://www.blendertutorialsfornoobs.co.cc/downloads.html

Main character

you should have a rough idea of the kind of character you want to create whether it be a human or animal, so its time to start modeling.

Open up blender and select the default cube. Enter edit mode by pressing "Tab" key or selecting "Edit mode" from the "Mode" drop down menu. Subdivide the cube by pressing "W" key and selecting "Subdivide".

Select the face select icon on the toolbar and in front view ("NumPad 1") select half of the cube. You can box select faces by pressing "B" key and dragging.


With half of the faces selected press "delete" and select faces. You should now be left with half a cube. You can now add a mirror modifier to the cube so that you only have to model half of your character.

To do this, in the buttons panel select "modifier" and then choose "mirror". it should by default replace the missing half of the cube with a mirror preview. now you can start modeling.


Add reference images by selecting "View" > "background image" on the toolbar. Click load and browse to your image file. Using the "X + Y" offsets line the image up with the cube.

Torso

Using a combination of extrude, grab, size and rotation begin to line the mesh up with the reference images making sure to look at front and side views. You can add more vertices's to the mesh at any time by subdividing or adding loop cuts to create more detail:

Shortcuts:

"G" key: Grab a vertex, edge or face
"S" key: size a face or edge (or multiple vertices's)
"R" key: rotate a face or edge (or multiple vertices's)
The above keys can be followed by "X, Y or Z" keys to lock the movement to that axis

"A" key: select/deselect all
"K" > "loop cut": add a line of vertices's
"W" > "subdivide" : split a selected face into 4 faces

outline the basic shape of the character. you can press "Z" key to toggle wire frame view which will let you see through the mesh so you can see the images better.


Once you have the basic shape outlined in the front view you can split the window and work from the side view. To do this mover the cursor over the black line between the buttons panel and the toolbar until the double headed arrow appears. right click and select "Split area". Drag the line across the screen and left click to accept. 

In the right hand window set the view to side by pressing "Numpad 3" and line the reference image up with the mesh. (don't move the mesh)

In the "background image" window use the "X + Y" offsets to line the image up. (It doesn't have to be perfect since the images are just a guide)

Continue moving the vertices's to line up with the image in the side view. ( you can select loops by holding "ALT" and right clicking an edge.


Arms

Once the torso is complete its time to start adding limbs. The arms are the easiest so that's where we will start.

If you haven't already, cut a hole in the side of the torso and extrude a shoulder. To do this find a face that roughly lines up with the shoulder position and press "W" > "subdivide" using the new vertices's create a round shape face, when complete select the faces and press "delete" > "Faces".

Extrude and rotate the shoulder as necessary.

Extrude the loop ("ALT + right click" to select) down the length of the arm making sure to capture the size changes.

Once you have extruded the arms in the front view move to the side view window and move each loop to line up with the image. You should have defined biceps and forearms to make it look more realistic.

once you reach the wrists leave the loop open and move to the legs. (we will cover hands and feet in a later tutorial)

You should now have something like this:


In this tutorial you have learnt...
  • How to use key commands to create a detailed mesh
  • New commands (subdivide, loop cut, loop select and lock axis)
  • The principles of creating a torso
  • How to split the view ports
  • How to enter face select mode
In the next tutorial we will add legs and a head to out character

Thanks for reading

More soon...

You should have a rough shape that looks something like this:

3D adventure game: Introduction

Visit: http://www.blendertutorialsfornoobs.co.cc/ for more tutorials for blender 3D

For these tutorials I will be using blender 2.49b which can be downloaded from: get blender

Make a 3D adventure game
After every tutorial I will add my .blend file to the downloads section of my website (link above) for reference along with any used textures and reference images. I will try to make this game using as little scripting as possible to make it easier for beginners but this means a lot of time will be spend on the logic.
This will be a tutorial that will be updated weekly to show you how to make a 3D adventure game (something like Indiana Jones or Lara croft-tomb raider). It will take a long time to make a realistic looking game that plays well so patience is key.

Planning:


Before we can start making a game we need to think about the characters, the environment and the style of the game. It might be worth while creating a text document to contain all this information.
The game I will make:
  • Third person perspective
  • An adventure style game (jumping ledges, finding clues etc.)
  • Realistic objects and textures
My main character will be a human explorer but you can model your character as anything you want. It’s useful to have some reference images of the type of character you want to make and you can download some useful blueprints at: http://www.the-blueprints.com/ (free)

What type of game would you make?

 More soon...

Blender 2.56

blender 2.56 download

New user interface:

Improver GUI

Blender 2.5 has a new GUI layout, with updated graphic design and a new icon set. The GUI layout has been re-designed to be clearer, better organised and easier to navigate, and is fully customisable with Python scripting. Other improvements include a new file browser, customisable tool shelf and more.

Customizable keyboard shortcuts

Blender 2.5 has been designed from scratch to enable users to configure their own keyboard shortcuts. Key definitions are be grouped in "key maps", and each map can be fully customized and saved. Keymaps can also be configured for special input methods such as directional gestures and tweak events, any-key modifiers, or multi-key input

Sculpt mode

Sculpt mode in Blender has been optimized,  increasing drawing and editing performance significantly, and reducing memory usage to support more detailed models. New tools have been added and existing ones improved. Multiresolution meshes have also been rewritten, now available as a modifier to integrate better with the animation system, and preserving displacements when editing the mesh topology


Blender 2.56 is still under development but considered stable

Blender 2.56 current stage:

More to come...