In the last tutorial we added legs and a head to our character. In this tutorial we will add hands and feet/shoes to the character, apply the mirror modifier and join the mesh, and add an armature skeleton which will let you move the different parts of the character for animation.
Hands
To make the hands start in front view (Numpad 1) and extrude the wrist down using "S" key to size the loop to the background image. Stop just before you get to the fingers and switch to side view to line the hand up with the image.
Once you have done that you need to start defining the finger loops:

To do this just select two opposite vertices's that line up with the finger position and size then using "S" key. If you don't have enough vertices's you can select an edge and press "W > Subdivide"
Next you need to join the loops for each finger rather than have one big loop. To do this select the two vertices's that will be in between the fingers and press "F" key. A line should appear in between making a separate loop:
You can tweak individual vertices's to make a better looking hand if you want and the more time you spend the better the result will be.
Shoes
The final part to the character is the shoes or feet depending on your character. Shoes are easier to make since you don't have to detail each toe.
To start the shoes extrude the ankle loop straight down to the bottom where the heel would be. in face select mode "CTRL + TAB + 3" select a few faces on the front of the shoe and press "delete > Faces"
you should now be left with an open section where you can extrude the shoe from:
Now you can just extrude the rest of the shoe forward working from the side view to keep it to scale. Remember to outline features such as the heel and the base of the shoe. When you are done you should have something like this:
You can now apply the mirror modifier because its no longer needed and join the mesh together.
In the buttons panel under the "Modifier" tab click the apply button. (Make sure you are in object mode) When you return to edit mode you will notice that you can now edit both sides of the character. Select the two loops that meet at the centre of the character using "ALT + right click" to select a loop and "Shift + ALT + right click" to select multiple loops.
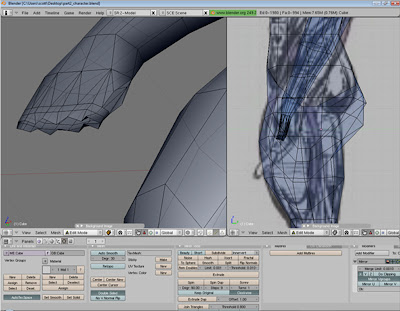
Press "F" key and select "Skin faces/edge-loops". This will fill in the gab between the character and prevent a seam from showing.
Skeleton
The next stage to making the character is to make a skeleton which will affect the mesh when its moved.
Enter object mode and in front view press "Space > Add > Armature". Position the armature in the upper chest area and press "TAB" to enter edit mode. Use the spheres at the ends of the armature to extrude from and start to make a basic skeleton.
In the buttons panel under the "Armature" tab you can toggle X-ray to let you see the bones through the mesh. Continue extruding the bones for the head, spine, arms and legs until you have something like this:
Don't forget to line the bones up in side view so they are mostly hidden in the mesh. Once you are finished press "TAB" to return to object mode.
now we need to make the character mesh follow the movements of the skeleton. To do this select the mesh and then select the skeleton. It is important that you select the mesh first. Press "CTRL + P" keys and select "Armature". In the "Create vertex groups" window select "Create from bone heat".
Your mesh will now follow the skeleton.
To test this you can select the skeleton and on the toolbar choose "Pose mode" from the mode drop down box. You can now select any bone and press either "G" or "R" key to move the bone.
We will be using the pose mode to animate the character in a later tutorial.
In the next tutorial we will:
- Detail the mesh to give the effect of clothes
- Prepare the mesh for textures
- Create a texture using a photo editing program such as Photoshop or GIMP (free)
- Apply the texture and view the render result
Thanks for reading
More soon...


